Please sign in so that we can notify you about a reply
Description
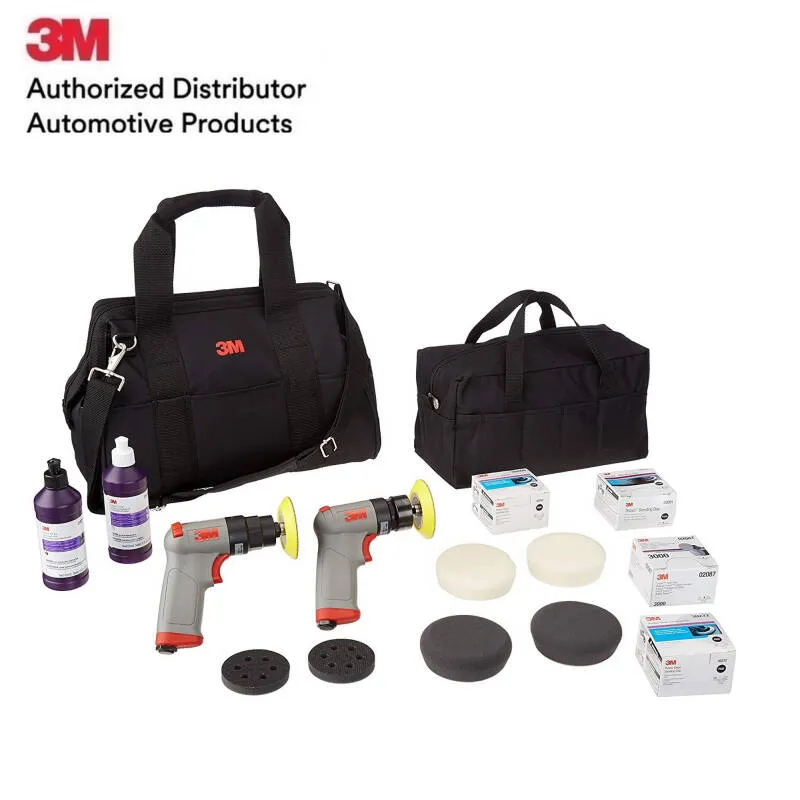
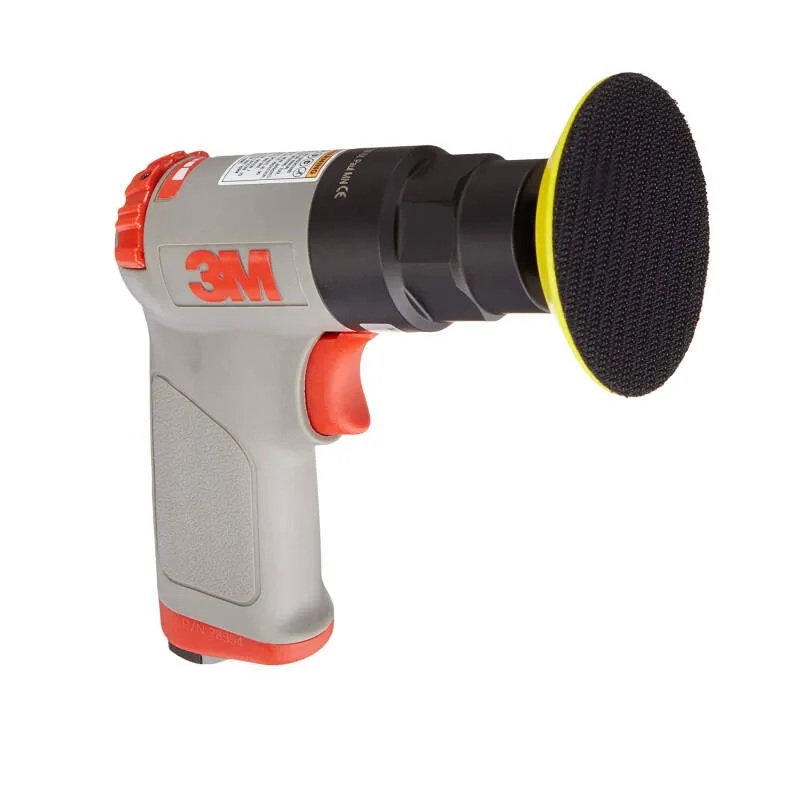
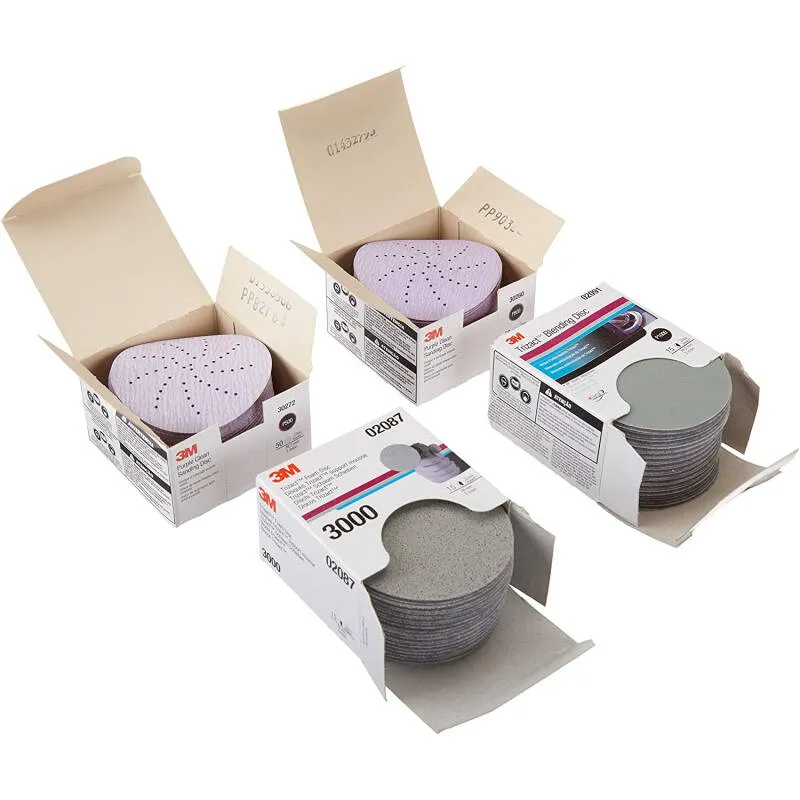
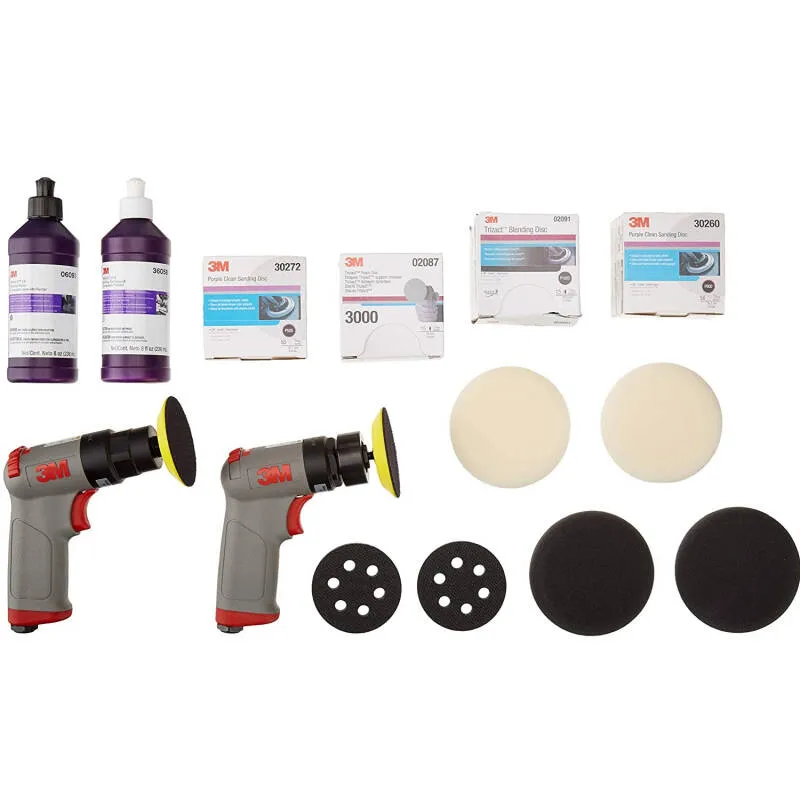
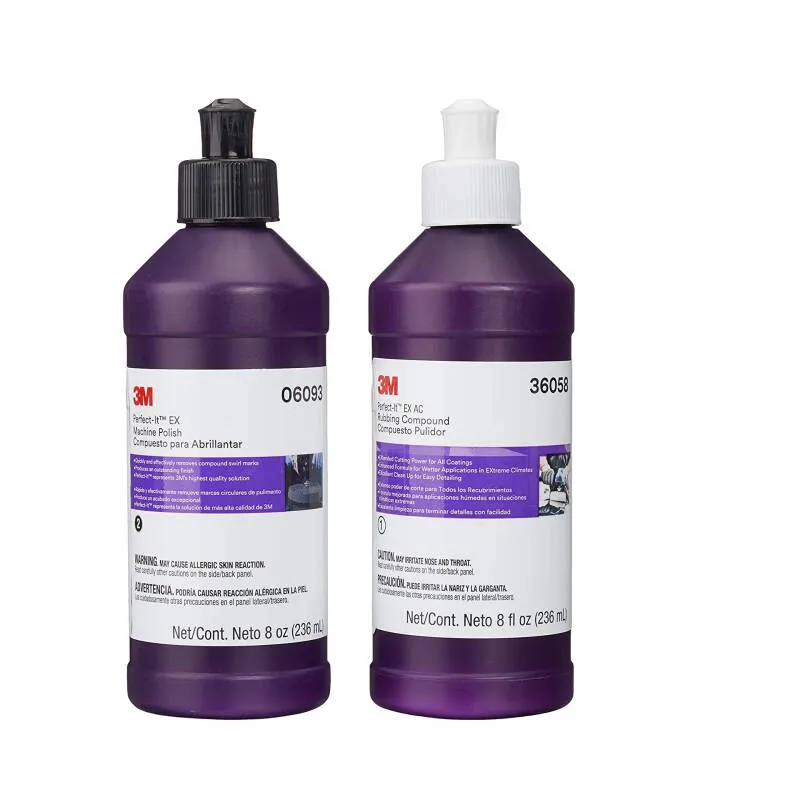
Complete set of car headlights Consisting of coarse foam, 3 -inch sandpaper scratch, 3 inches polished foam, coarse polishing liquid, car headlights, seizures, 3 inch sandpaper, P500, 3 -inch P800 sandpaper, 3 inches sandpaper, Sai Sacs 1000, Sandpaper 3 inches. Cake number 3000, 2 scrubbing sponge, 2 polishing machines, eliminating yellow lenses or scratches from the outside as well. Sand paper polishing machine 3 "(3" SANDING TOOL) 1. Clean the lens surface With shampoo or water And protect the area around the lens with 3M2 tape. Solf Interface Pad 3 "PN05771) with sandpaper 3", with the Class that says "SANDER" or observing the specified up to 12,000 RPM3. Add the P800 (PN30260 sandpaper) with a sponge key that is attached to the sandpaper. 3 "4. Start the P800 sandpaper until the yellow stains or scratches are gone. In this step, if the sandpaper runs out sharp or observed from the long time in the battle, change the P800 sandpaper until the battle of the scratches or yellow stains can disappear. 5. Wipe clean to check the stains. Yellow or scratches that run out If still finding scratches Or yellow stains, continue to interrupt until it runs out. Note: In the event that the yellow stains or scratches are very much, it may be necessary to use P500 Sandpaper (P30272) in the first step and then followed by sandpaper number. P800 eliminates sandpaper marks to be more resolution. Sand paper polishing machine 3 "(3" SANDING TOOL) 6. Interrupted the P800 by using Trizact P1000 (PN02091) with the Solf Interface Pad 3 "PN 05771). Used to scrub P800 (Sand paper polishing machine 3 "SANDING TOOL) 7. Spray water from the spray bottle to the lens and sandpaper. Trizact P1000 before scrubbing the P800 Sandpaper P800. White, which is caused by the Trizact sandpaper, is fighting the P800 marks. Inject more water. If found that the surface of the lens starts to dry in the polishing of the Trizact sandpaper, it should avoid the sharp framework. To extend the lifespan of sandpaper, TRIZACT8. Wipe clean to check that the P800 sandpaper can be completely observed from the lens. TRIZACT9. After that, scrub the TRIZACT P1000 by using sandpaper Trizact P3000 (PN 02087), paired with a sponge keyboard. 10. To scrub the TRIZACT P1000 polishing paper using the Trizact P3000 sandpaper. Don't forget to spray water as well as the stage. Previously, and observed the white stains caused by the work of sandpaper Trizact 3000 as well. 11. Wipe clean to check the removal of the Trizact P1000 marks. It can be seen that the marks are more resolution and the lens is white, polished, using 3 "(3" polisher) polishing the lens with 3 "( 3 "Polisher) 12. Make a translation to polish in the steps 12-18 by looking at the device that has a" Polisher "or a maximum round of 2500 rounds of purple sponge (PN30041) with Polished machine 3 "13. In this step, the white sponge will be interrupted with 3M Plastic Cleaner (PN36058). The amount of 1-2 ml is scrubbed until the blue paper from the Trizact P3000 sandpaper is gone and the lens is clearer. Obviously. 14. If the lens still has a blemish, put 3M plastic cleaner and scrub again. Should not scrub the sponge By 15. Wipe the white sponge. Note: If the user considers silicone Stop scrubbing now. But if not taking into account the said matter, then continue to interrupt in the next step. 16. Continue with the use of the black sponge (PN30042), with the same polishing machine used in the previous step 17. Use 3M Polish (PN306093) in the amount of approximately 1 ml and then scrubbing to The lens is more clear and shadow. 18. Then scrub with a black sponge to make the lens more clear and shadow. 19. Wipe clean with a soft or 3M microfiber.
Reviews
No reviews found
- Menu
- Acne & Spot Treatment
- Adhesives & Tapes
- Adult Diapers Pants
- Adult Diapers Tape
- Air Intake & Fuel Delivery
- Amino Acids
- Amplifiers & Effects
- Anti-Decubitus Pads
- Antivirus & Security
- Auto Care & Detailing
- Auto Service
- Backpacks
- Bags, Carriers & Travels
- Balls
- Bar Tools & Accessories
- Bases & Primers
- Bass Guitars
- Bath Rugs & Mats
- Bath Towels
- Bath&BodyGifts&Bundles
- Bathroom Accessories Sets
- Bathroom Bench
- Bathroom Scales
- Batteries
- Battery Chargers & Jump Starters
- BB & CC Creams
- Bean Bags & Inflatable Furniture
- Beauty & Skin Care
- Beauty Supplements
- Bedding Accessories
- Bedding Sets
- Beds & Furniture
- Bedside Table
- Belts & Buckles
- Bike Parts, Tires & Accessories
- Binoculars
- Blankets & Wrappers
- Blankets, Duvets & Comforters
- Blenders & Juice Extractors
- Blowers, Dust Extractors & Vacuums
- Blushes & Bronzers
- Body Makeup
- BodyMoisturizers
- BodySunCare
- Bowls & Feeders
- Bowls & Plates
- Braces, Splints & Supports
- Breast Milk Storage
- Breast Pumps & Gear
- Brooms, Dustpan & Accessories
- Cables & Converters
- Cages, Crates & Doors
- Camp Bedding & Sleeping Bags
- Camp Furniture
- Camp Kitchen Gear
- Camp Knives & Tools
- Camp Lights & Lanterns
- Camping Backpacks
- Camping Safety & Survival
- Can Openers
- Candle Lanterns & Holders
- Candles
- Capsule Coffee Machines
- Car Air Purifiers
- Car Alarms & Security
- Car Audio & Video Cables
- Car Backup Cameras
- Car Batteries
- Car Brake Parts
- Car Cameras
- Car Chargers
- Car Decals & Emblems
- Car Electronics Accessories
- Car Filters
- Car Media Players & Monitors
- Car Oils & Fluids
- Car Performance & Racing Parts
- Car Phone Holders & Mounts
- Car Seats & Boosters
- Car Speakers
- Car Stereo Receivers
- Car Subwoofers
- Cardio Equipment
- Cat Clothing & Accessories
- Cat Health & Dental care
- Cat Litter & Toilet
- Cat Milk Replacers
- Cat Toys
- Cat Treats
- Cat Veterinary Diets
- CD Changers
- Ceiling Type
- Cereals
- Chains, Ropes & Tie-Downs
- Chairs
- Changing Pads & Sheet Protectors
- Changing Tables
- Chargers
- Chemicals
- Christmas & New Year Decor
- Circuit Breakers & Consumer Units
- Classes & Activities Vouchers
- Cleaning Buckets & Tubs
- Climbing Ropes, Cords & Webbing
- Clocks
- Cloth Diapers
- Clothes Lines & Drying Racks
- Clothes Racks & Stands
- Coffee & Tea Cup Sets
- Coffee Capsules
- Coffee Machine Parts & Accessories
- Coffee Maker & Grinders
- Coffee Presses
- Colanders & Strainers
- Cold Brewing Equipment
- Commode Chair
- Compacts & Powders
- Computer Cases
- Computer Cleaners
- Concealers & Correctors
- Concentrated Drinks & Syrups
- Conditioners
- Consoles
- Contour & Shading
- Controllers
- Cooktops,Ranges&TabletopStoves
- Cookware Accessories
- Cookware Sets
- Cooling System
- Cradles, Bassinets & Swings
- Creams & Moisturizers
- Cribs
- Cushions & Covers
- Cutting Boards
- Desktop Computers
- Detox & Cleanse
- Dining Tables
- Dinnerware Sets
- Dish Dryers & Disinfectors
- Dishwashers & Parts
- Disposable Changing Pads
- Disposable Diaper Pants
- Disposable Tape Diapers
- Diving & Snorkeling
- Docks & Stands
- Dolls & Stuffed Toys
- Dolls & Stuffed Toys
- Dolls & Stuffed Toys
- Dolls & Stuffed Toys
- Door Hardware & Accessories
- Door Locks & Handles
- Doors & Frames
- Drain Cleaners
- Dressers & Chests
- Dried Meats & Seafood
- Drink Bottles
- Drivetrain & Transmission
- Drums & Percussion
- Dry Cat Food
- Dry Dog Food
- Dryers
- DSLR
- DVD & Blu-ray Players
- Earphones
- ECG & Oximeter
- Electric Bikes
- Electrical Parts
- Emission Control Parts
- Enclosures
- End Users SIM Cards
- Endurance & Energy
- Engine Cooling Parts
- Engines & Components
- Equalizers & Processors
- Essential Oils & Diffusers
- Exercise Bikes
- Exhaust Parts
- Extension Cords & Power Strips
- Exterior Accessories
- External Hard Drives
- Eye & Brow Makeup Accessories
- Eye Health
- Eye Primers
- Eye Shadows & Palettes
- Eye Treatment
- Eyebrow Makeup
- Eyeliners
- Facial Cleansers
- Facial Masks
- Facial Scrubs & Exfoliators
- Facial Sun Care
- Facial Tissues
- Facial Tools & Devices
- False Lashes
- Fashion
- Fashion Bags
- Fax Machines & Copiers
- Feeding Accessories
- Feeding Bottles & Nipples
- Fencing & Gates
- Film Cameras
- Filters
- Fish Aquariums & Tanks
- Fish Food & Treats
- Fish Health & Wellness
- Fish Tank Cleaning & Maintenance
- Fish Tank Décor & Accessories
- Fishing Line
- Fishing Rods & Reels
- Fishing Storage & Accessories
- Fishing Tools & Equipment
- Flashes
- Flashlights & Emergency Lights
- Floor Lamps
- Floor Type
- Foam Rollers
- Follow-on Formula 2
- Food & Beverage Gifts
- Food & Drink Supplements
- Food Dehydrators
- Foundations
- Fragrance Gifts & Bundles
- Freezers
- Fresh Fruits
- Front Load
- Gaming Accessories
- Gaming Software
- Garbage & Recycling Bins
- Garbage Bags
- Gardening & Outdoor Tools
- Gates & Doorways
- Gimbal Stabilizers
- Gloves & Mittens
- Golf Bags & Accessories
- GPS & Accessories
- Graphics & Multimedia
- Grinders
- Grooming Deals
- Grooming Equipment
- Guitars
- Gutters & Accessories
- Gym & Sports Bags
- Hair Care Gifts & Bundles
- Hair Coloring
- Hair Styling
- Hair Styling Appliances
- Hair Treatment
- HairRemoval
- Hand Saws, Utility Knives & Blades
- Hand Wraps
- Hand&NailMoisturizers
- Handheld Game Players
- HandMasks&Scrubs
- Headphones & Headsets
- Health And Beauty
- Health Care Deals
- Healthy
- Hearing Aid
- Helmets
- Helmets & Protective Gear
- Highchairs & Boosters
- Highlighters & Shimmers
- Home And Decorate
- Home Appliance
- Home Audio Accessories
- Home Equalizers
- Home Receivers & Amplifiers
- Home Speakers & Subwoofers
- Home Theater Systems
- Honey
- Ice Buckets
- Ice Cream Makers
- Inks & Toners
- Insect & Pest Control
- Instant Coffees
- Instant Film Cameras
- Instant Teas
- Instrument Parts & Accessories
- Insulation & Accessories
- Interior Accessories
- Internal Hard Drives & SSD
- Ironing Boards & Covers
- Irons, Steamers & Accessories
- Keyboards
- Kids' Bikes
- Kids' Chairs & Stools
- Kids' Closets
- Kids' Sports Sandals & Slides
- Kids' Sports Swimwear
- Kids' Tables
- Kids' Water Bottles & Trainer Cups
- Kids' Water Shoes
- Kitchen Knives & Accessories
- Kitchen Scales
- Kitchen Sideboards & Cabinets
- Kitchen Utensil Sets & Bundles
- Kitchenware
- Lamp Sets
- Laptop Cases
- Laptop's Backpacks
- Laptop's Handbags
- Laptop's Shoulder Bags & Messenger Bags
- Laptops
- Lash & Brow Enhancers
- Laundry Bags & Washing Balls
- Lenses
- Light Bulbs
- Lighting & Accessories
- Lip Balms & Treatment
- Lip Glosses
- Lip Liners & Pencils
- Lip Plumpers & Sealers
- Lip Stains & Tints
- Lipsticks
- Liquid Lipsticks
- Local Snacks
- Lotions & Essences
- Lubricating Fluid
- Makeup Brush Cases
- Makeup Brush Cleaners
- Makeup Brushes & Sponges
- Makeup Gifts & Bundles
- Makeup Glitters & Jewels
- Makeup Palettes & Sets
- Makeup Removers
- Makeup Tools & Accessories
- Male Delay
- Manicure Kits & Accessories
- Manual Coffee Grinders
- Manual Milk Frothers & Pitchers
- Martial Art Uniform
- Mascaras
- Mass & Weight Gainers
- Massage Chairs
- Matcha Bowls & Whisks
- Maternity Accessories
- Maternity Formula
- Maternity Wear
- Mattress Pads & Toppers
- Mattress Protectors
- Mattresses
- Meal Prep
- Memory
- Men's Analogue Watches
- Men's Backpacks
- Men's Bath & Body
- Men's Belts & Buckles
- Men's Digital Watches
- Men's Facial Washes
- Men's Fashion Bags
- Men's Fragrances
- Men's Gloves & Mittens
- Men's Hair Care
- Men's Handbags
- Men's Hiking & Trekking
- Men's Polo Shirts
- Men's Shaving & Grooming
- Men's Shirts
- Men's Shoulder Bags & Messenger Bags
- Men's Skin Care
- Men's Sports Sandals & Slides
- Men's Sports Watches
- Men's T-Shirts
- Men's Tanks
- Men's Wallets & Key Chain Pouches
- Men's Water Shoes
- Men'sJackets,Vests&Coats
- Men'sRunning
- Microphones
- Microwaves
- Mini-bar
- Mirrorless
- Mobility Aids
- Modems and Routers
- Mopping & Accessories
- Mosquito Net
- Mouse
- Mousepads
- Mugs & Teacups
- Multi-Door
- Multi-Tools
- Musical Instruments
- Nail Art & False Nails
- Nail Polish Removers
- Nail Polishes & Coats
- Nail Treatment & Cuticle Care
- Nails, Screws & Fasteners
- NAS
- Nasal Care
- Network Adaptors
- Network Cards
- Network Switches
- Non-Electric Teapots
- Nursing Bed
- Nursing Wear
- Nutritional Supplements
- Office & Business
- Office Cabinets & Shelves
- Office Chairs
- Office Desks & Workstations
- Oil Blotting Sheets
- Oils
- Operating System
- other
- Other Bathroom Fixtures
- Other Bedroom Furniture
- Other Building Supplies & Hardware
- Other Camera Accessories
- Other Coffee Accessories
- Other Computer Accessories
- Other Flooring Supplies
- Other Gadgets
- Other Gaming
- Other Garden & Outdoor
- Other Home Organizers
- Other Household Appliances
- Other Housekeeping Tools
- Other Kitchen Room Furniture
- Other Kitchen Utensils
- Other Living Room Furniture
- Other Men's Accessories
- Other Musical Instruments
- Other Office Furniture
- Other Phone Accessories
- Other Portable VDO & Audio
- Other Power Tools
- Other Serveware
- Other Sexual Wellness
- Other Small Kitchen Appliances
- Other Stringed Instruments
- Other Tea Accessories
- Other Toys
- Other TV Accessories
- Other Utilities
- Outdoor Lighting
- Outdoor Storage & Shelves
- Ovens
- Pacifiers&Teethers
- Paints&Primers
- Parking Sensors
- Patio Sets
- PC Case Modding
- Peelers, Slicers & Choppers
- Phone Cases
- Pianos & Keyboards
- Pillow & Bolster Cases
- Pillows & Bolsters
- Pipes, Valves & Fittings
- Play Gyms & Play Mats
- Portable Air Conditioners
- Portable Players
- Portable Speakers
- PortablePlayers
- PortableSpeakers
- Post-Workout & Recovery
- Pots & Sauce Pans
- Potties
- Pour-Over Equipment
- Powdered Drink Mixes
- Power Banks
- Power Drills & Drivers
- Power Sanders & Polishers
- Power Supply Units
- Pre-Workout
- Prepaid SIM Cards
- Printers
- Processed Fruits & Vegetables
- Professional Microphones & Accessories
- Projector Accessories
- Proteins
- Pumps
- Punching Bags
- Racquets
- Range Hoods
- Ready To Drink Coffees
- Rice
- Rice Cookers
- Roast & Ground Coffees
- Safes
- Safety & Protective Gear
- Salt
- Sanitary Wipes
- Saws & Cutters
- Scanners
- Screen Protectors
- Security & IP Cameras
- Selfie Sticks
- SelfTanning
- Serums & Ampoules
- Server
- Serving Trays & Bowls
- Setting & Finishing Sprays
- Sewing Machines
- Sexual Health
- Shampoos
- Shampoos & Cleaning Products
- Shelves
- Shoe Care & Cleaners
- Shoe Racks & Boxes
- Side-by-side
- Skin Care Gifts & Bundles
- Skin Nourishment
- Slime & Squishy Toys
- Small Pet Bowls & Feeders
- Small Pet Cages & Habitats
- Small Pet Food & Treats
- Small Pet Grooming & Health
- Small Pet Leashes, Collars & Harnesses
- Small Pet Toys
- Smart Health
- Smart Home
- Smart Speakers
- Smart TVs
- Smart Watches & Fitness Trackers
- Soap Holders & Dispensers
- Solid State Drives (SSD)
- Sound Cards
- Soundbars
- Specialty
- Specialty Cookware
- Sponges & Scourers
- Spoons, Forks & Other Cutlery
- SPORT
- Sports Gloves
- Sports Water Bottles
- Sprays & Mists
- Starting & Charging Parts
- Steel Products
- Storage & Organization
- Storage Baskets & Bins
- Storage Boxes & Containers
- Stovetop Coffee Makers
- Strainers, Filters & Infusers
- Streaming Media Players
- Stroller Accessories
- Strollers
- Studio Recording Equipment
- Styluses
- Sugar & Sweeteners
- Sunscreen Nets & Canvases
- Support & Protective Gear
- Suspension & Steering Parts
- Table & Desk Lamps
- Table Tennis
- Tablet Accessories
- Tabletop Radios & CD Players
- Tableware
- Tanks & Water Pumps
- Tapestries, Rugs & Carpets
- Tea Leaves & Tea Bags
- Tents, Shelters & Accessories
- Thermogenics
- Thermometers & Timers
- Tinted Moisturizers
- Toddler Formula 3
- Toilet Paper Holders
- Toners
- Tools & Hardware Storage
- Toothbrushes
- Toothpastes
- Top Load 1 Tub
- Top Load 2 Tub
- Towel Rings & Hooks
- Training Equipment & Supplies
- Traps & Drains
- Tripods & Monopods
- Turners & Ladles
- TV Boxes & Receivers
- Ukuleles
- Umbrellas
- Under Eye Concealers
- Unisex Fragrances
- USB Flash Drives
- USB Hubs & Card Readers
- Vacuum Cleaners
- Vacuum Coffee Makers
- Visual Presenters
- Vitamin & Beauty Drinks
- VR & AR Glasses
- Walkie-Talkies
- Walking Aids
- Walking Stick
- Wall Art
- Wall Hooks & Hangers
- Wallpapers
- Warmers & Sterilizers
- Washer & Dryer 2 in 1
- Washer & Dryer Accessories
- Water Coolers & Dispensers
- Water Dispensers & Purifiers
- Watering Systems & Garden Hoses
- Weight & Strength Training
- Weight Management
- Welding Tools
- Well Being
- Wet Cat Food
- Wheelchair
- Window Cleaning & Squeegees
- Window Handles
- Window Hardware & Accessories
- Windows & Frames
- Wine & Beverage Coolers
- Wine & Champagne Glasses
- Wine & Drinks Cabinets
- Wipers & Washer Components
- Women's Analogue Watches
- Women's Backpacks
- Women's Belts & Buckles
- Women's Blouses & Tunics
- Women's Dresses
- Women's Eyeglasses
- Women's Fashion Bags
- Women's Fragrances
- Women's Gloves & Mittens
- Women's Handbags
- Women's Hats & Caps
- Women's Jeans
- Women's Long Pants
- Women's Polo Shirts
- Women's Scarves, Shawls & Wraps
- Women's Shirts
- Women's Shorts
- Women's Shoulder Bags & Messenger Bags
- Women's Sports & Outdoor Pants
- Women's Sports & Outdoor T-Shirts
- Women's Sunglasses
- Women's T-Shirts
- Women's Tanks
- Women's Tote Bags
- Women'sSuits&Blazers
- Woodwind Instruments
- Electronics
- Computers
- Sports & Outdoors
- Apparel
- เครื่องประดับ
- เฟอร์นิเจอร์
- exercise-equipment
- แม่และเด็ก
- อุปกรณ์สำหรับสัตว์เลี้ยง
